Welcome to the comprehensive guide for your Blackstone Grill! This manual provides detailed instructions for assembly, maintenance, troubleshooting, and cooking techniques to ensure optimal performance and delicious results.
1.1 Overview of the Blackstone Grill
The Blackstone Grill is a versatile and durable cooking appliance designed for grilling, air frying, and pizza making; Known for its solid construction and even heat distribution, it offers a wide temperature range, making it ideal for various cooking techniques. The grill features a rotating stone for consistent cooking results and a user-friendly interface. Its compact design suits both home and outdoor use, appealing to cooking enthusiasts of all skill levels. With proper maintenance, the Blackstone Grill delivers long-lasting performance, ensuring delicious meals for years to come.
1.2 Importance of the Manual for Optimal Use
This manual is essential for maximizing the performance and longevity of your Blackstone Grill. It provides clear instructions for assembly, operation, and maintenance, ensuring you avoid common pitfalls like uneven heating or ignition issues. By following the guidelines, you can prevent damage, optimize cooking results, and maintain safety. The manual also offers troubleshooting solutions for issues like platter rubbing or motor problems, helping you resolve them quickly. Whether you’re a novice or an experienced user, this guide will help you unlock your grill’s full potential and enjoy consistent, high-quality cooking experiences.
Assembly and Setup Instructions
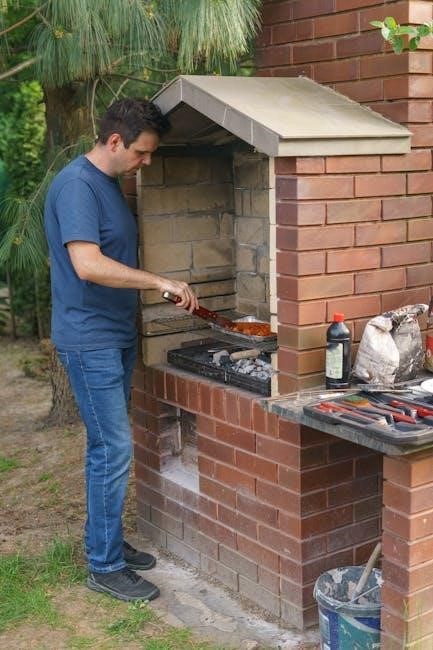
This section guides you through unpacking, inventorying parts, and assembling your Blackstone Grill step-by-step. Ensure all components are correctly aligned and secured. Initial safety checks are crucial for safe operation. Proper setup ensures optimal performance and longevity. Allow about 2 hours for assembly.
2.1 Unpacking and Inventory of Parts
Begin by carefully unpacking your Blackstone Grill to ensure no components are damaged. Check for all included parts, such as the grill body, platter, motor, and accessories. Verify the inventory against the manual’s list to confirm everything is present. Look for any signs of damage or missing items. Organize the parts in a clean, dry area to avoid misplacement. This step is crucial for a smooth assembly process. Ensure all components are accounted for before proceeding to assembly. Proper organization will save time and prevent delays during setup. Refer to the manual for a detailed list of expected parts and tools.
2.2 Step-by-Step Assembly Guide
Start by placing the grill body on a stable surface. Attach the legs securely using the provided bolts, ensuring even balance. Next, align the platter with the grill body and fasten it using the screws. Connect the motor to the platter, following the manual’s alignment guide. Ensure all wires are properly secured to avoid interference. Attach any additional accessories, such as the pizza stone or air frying basket, according to the instructions. Double-check all connections and tighten any loose parts. Finally, perform a test run to ensure the motor operates smoothly and the platter rotates evenly. Refer to the manual for specific torque settings and safety precautions. Proper assembly is key to optimal performance. Always follow the sequence outlined in the manual to avoid errors. If unsure, consult the troubleshooting section for common issues. Ensure all parts are securely fastened before first use. A well-assembled grill guarantees safety and efficiency. Take your time to ensure accuracy during this process. Assembly typically takes about 2 hours, depending on your familiarity with the components. Once complete, your Blackstone Grill will be ready for initial setup and safety checks. Avoid skipping steps to maintain warranty coverage and ensure proper functionality. If any part feels unstable, recheck the connections and tighten as needed. A sturdy assembly ensures years of reliable cooking performance. Always refer to the manual for specific instructions tailored to your model. If you encounter any difficulties, consider consulting online forums or contacting Blackstone support for assistance. Proper assembly is the foundation of a great cooking experience.
2.3 Initial Setup and Safety Checks
After assembly, plug in the grill and perform a thorough safety check. Ensure all connections are secure and no wires are exposed. Inspect the platter for proper alignment and balance. Check for any damage or wear on moving parts. Test the motor by running it at low speed to ensure smooth operation. Verify that the platter rotates evenly and does not wobble. Ensure the grill is placed on a heat-resistant surface, away from flammable materials. Keep children and pets at a safe distance during operation. Familiarize yourself with the emergency stop button and ensure it functions correctly. Always preheat the grill gradually to avoid sudden temperature spikes. Refer to the manual for specific safety guidelines tailored to your model. Proper initial setup ensures safe and efficient cooking. Regularly inspect and maintain your grill to prevent potential hazards. Address any issues promptly to maintain optimal performance and warranty coverage. Safety checks are crucial before every use to ensure a risk-free cooking experience.
Troubleshooting Common Issues
Address ignition problems by cleaning the igniter or replacing the spark module; Fix uneven heating by adjusting burner levels or ensuring proper airflow. Resolve platter rubbing by bending the front silver trim. Replace worn drive shafts or motors to maintain smooth operation. Regular maintenance and inspections can prevent many issues. Always refer to the manual for specific solutions tailored to your model. Quick fixes and proper care ensure optimal performance and longevity of your Blackstone Grill.
3.1 Ignition Problems and Solutions
Ignition issues are common but easily fixable. If the igniter clicks but doesn’t spark, clean the igniter electrode or replace the spark module. Ensure the burner cap is properly aligned and free from debris. Check for loose connections in the wiring or igniter switch. If the problem persists, inspect the spark generator or replace it if necessary. Regularly cleaning the burner ports and ensuring proper gas flow can prevent ignition failures. Always follow safety guidelines when troubleshooting electrical components. Refer to your manual for specific instructions tailored to your Blackstone Grill model for optimal results and safety.
3.2 Addressing Uneven Heating
Uneven heating can occur due to misaligned platters or clogged burner ports. To fix this, ensure the platter is level and properly seated. Clean the burner ports regularly to maintain consistent gas flow. If the issue persists, check for food debris or residue on the platter and burners. Adjusting the burner knobs to balance the flame can also help achieve even heat distribution. For persistent problems, consider replacing worn-out burner caps or consulting the manual for specific calibration instructions. Proper maintenance and alignment will ensure your Blackstone Grill heats evenly, enhancing your cooking experience and preventing damage to components.
3.3 Fixing the Platter Rubbing Issue
The platter rubbing issue on your Blackstone Grill can be resolved by gently bending the silver front part below the platter. Using your fingers, press down on the area above the “B” in Blackstone to create clearance. Ensure the platter is level, as even a slight tilt can cause friction. If the problem persists, check for debris or uneven surfaces. Regularly cleaning the platter and surrounding areas will prevent this issue. This simple adjustment ensures smooth operation and prevents damage to the grill’s components, maintaining optimal performance for all your cooking needs.
3.4 Drive Shaft Replacement and Maintenance
Replacing the drive shaft on your Blackstone Grill is essential for maintaining smooth operation. Start by disconnecting the power and cooling the grill. Remove the retaining clips and pull out the old shaft. Install the new drive shaft, ensuring proper alignment. Secure it with the provided clips. Regularly lubricate the shaft with food-safe grease to prevent wear. Inspect for signs of damage or misalignment, addressing issues promptly to avoid further complications. Proper maintenance ensures consistent performance and extends the grill’s lifespan, keeping your cooking experience seamless and enjoyable. Always refer to the official Blackstone parts for compatibility and safety.
3.5 Motor Issues and Replacement
If your Blackstone Grill’s motor is malfunctioning, it may exhibit symptoms like unusual noise, slow rotation, or complete stoppage. First, ensure the motor is clean and free from debris. Check power connections and fuses. If issues persist, replacement may be necessary. To replace the motor, disconnect power, remove mounting screws, and carefully lift the old motor out. Install the new motor, ensuring proper alignment and secure fastening. Refer to the manual for specific torque settings. Regular maintenance, such as cleaning and lubricating moving parts, can prevent motor issues. Always use genuine Blackstone replacement parts for optimal performance and safety.
Maintenance and Cleaning
Regular maintenance ensures your Blackstone Grill performs optimally. Clean grates and surfaces after each use to prevent food residue buildup. Deep clean periodically for longevity and hygiene.
4.1 Regular Cleaning Practices
Regular cleaning is essential for maintaining your Blackstone Grill’s performance. After each use, allow the grill to cool slightly before brushing off food residue with a stiff brush. Wipe down the exterior with a damp cloth to remove splatters and stains. For tougher grime, mix baking soda and water to create a paste, apply it to the affected areas, and let it sit before scrubbing. Avoid harsh chemicals, as they can damage the finish. Consistent cleaning prevents rust and ensures a hygienic cooking surface for your next meal. Regular maintenance also extends the lifespan of your grill.
4.2 Deep Cleaning the Grill and Accessories
Deep cleaning your Blackstone Grill involves a thorough scrub of all components. Remove the grates and soak them in warm soapy water for at least an hour. Use a stiff brush to scrub away stubborn grime and food particles. For the interior, mix equal parts water and white vinegar in a spray bottle. Spray the surfaces and let it sit for 30 minutes before wiping clean with a damp cloth. Accessories like pizza stones and trays should be scrubbed with a non-abrasive cleaner and rinsed thoroughly. Regular deep cleaning prevents the buildup of residue and maintains the grill’s efficiency and hygiene.
4.3 Replacement of Worn-Out Parts
Regularly inspect your Blackstone Grill for worn-out parts, such as the drive shaft, motor, or stones, which may need replacement. Identify these parts by checking for visible wear, unusual noises, or reduced performance. Purchase replacement components from authorized dealers or Blackstone’s official website to ensure compatibility. Before replacing, refer to the manual for specific instructions. Properly dispose of old parts and follow safety guidelines during installation. Timely replacement prevents further damage and maintains your grill’s efficiency. Always use genuine Blackstone parts to uphold the product’s quality and warranty standards.
Cooking Techniques and Best Practices
Master grilling, pizza cooking, and air frying on your Blackstone Grill. Explore high-temperature techniques, optimal food preparation, and timing for perfect results every time. Use recommended tools and follow guidelines for enhanced flavor and safety.
5.1 Mastering Grilling on the Blackstone
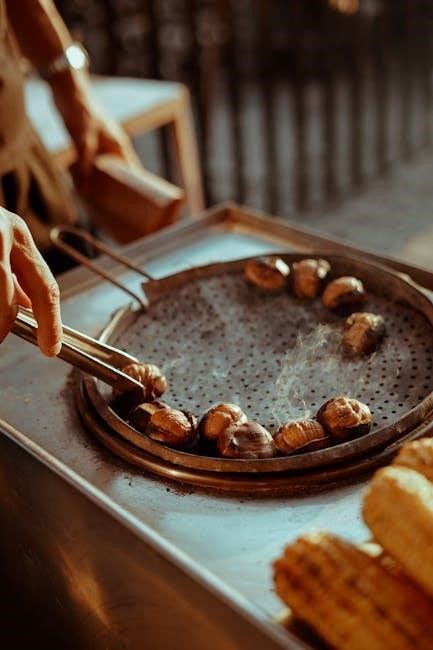
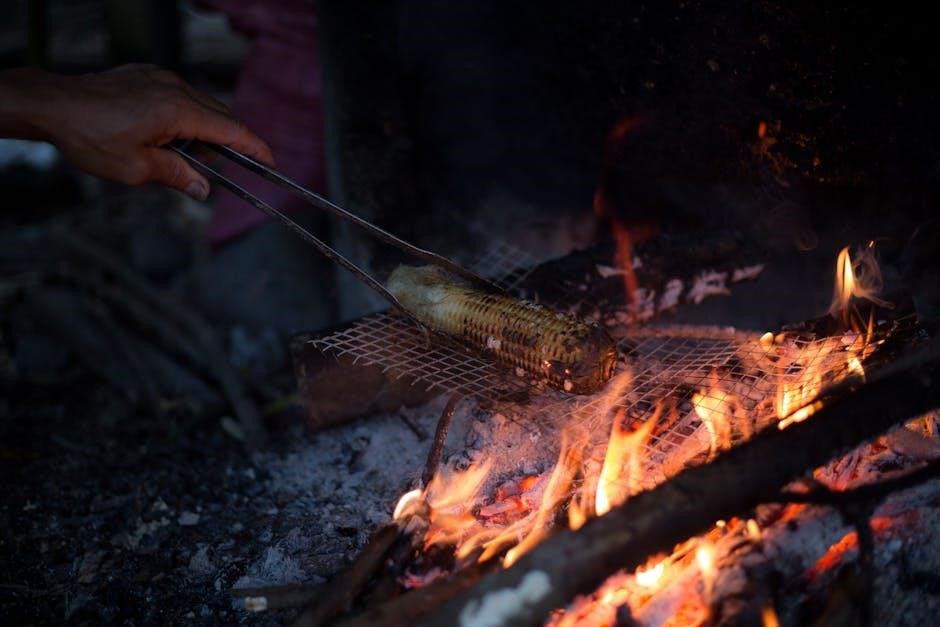
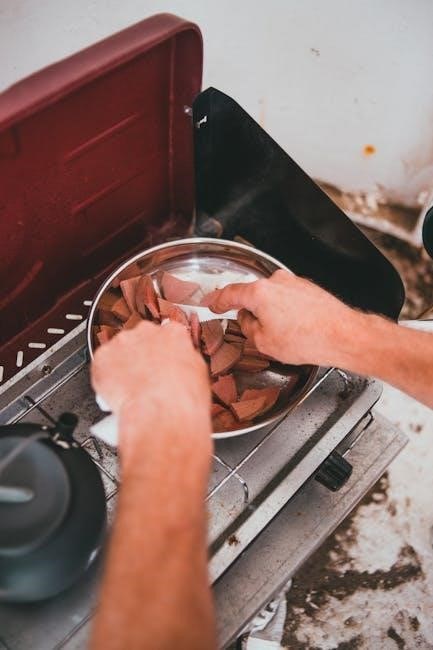
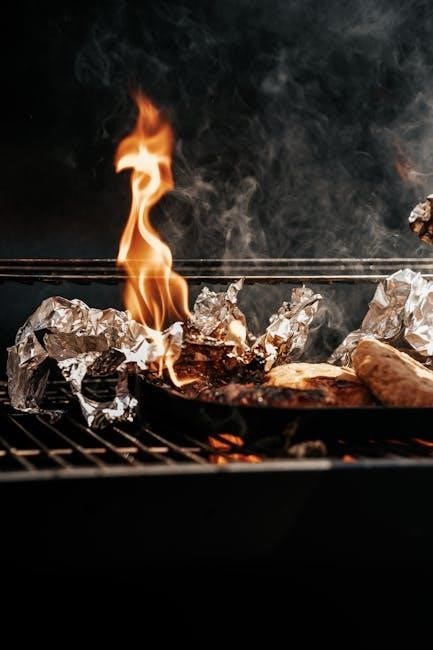
Mastering grilling on the Blackstone requires precision in temperature control and timing. Preheat the grill to the desired temperature and use a food thermometer for accuracy. Lightly oil the grates before cooking to prevent sticking and achieve perfect sear marks. For meats, sear at high heat first, then finish at lower temperatures. Vegetables cook quickly, so monitor closely. Toast buns on the grates for a crispy texture. Avoid overcrowding the grill to ensure even cooking. Flip foods gently to maintain juices. Experiment with seasonings and marinades for enhanced flavor. Finish with a pat of butter or a drizzle of glaze for a professional touch.
5.2 Perfecting Pizza Cooking
Perfecting pizza on your Blackstone Grill involves achieving a crispy crust and evenly cooked toppings. Preheat the grill to 600°F with the pizza stone inside for optimal results. Roll out dough thinly and transfer to a floured peel or parchment paper. Top with sauce, cheese, and desired toppings, keeping it simple for the first bake. Slide the pizza onto the stone and cook for 2-3 minutes, rotating halfway for even cooking; Monitor closely to avoid burning. Remove with a peel and let cool slightly. Brush the crust with olive oil for a golden finish. Experiment with toppings and sauces for unique flavor combinations.
5.3 Air Frying and High-Temperature Cooking
Air frying and high-temperature cooking on your Blackstone Grill can achieve crispy, restaurant-quality results. Preheat the grill to 600°F, using the pizza stone for even heat distribution. Place food like fries or chicken in a single layer on the stone or in a compatible air fryer basket. Cook for 10-15 minutes, flipping halfway, until golden and crispy. The grill’s high-temperature capability ensures a caramelized crust. For optimal results, pat food dry before cooking and season lightly. Experiment with marinades and spices for enhanced flavor. This method is ideal for healthier frying with minimal oil, delivering a satisfying crunch every time.
Accessories and Upgrades
Enhance your Blackstone Grill experience with essential accessories like air fryer baskets, pizza stones, and grill covers. Upgrades such as replacement stones and drive shafts ensure long-term performance and versatility.

6.1 Essential Accessories for Enhanced Cooking
Maximize your Blackstone Grill’s potential with must-have accessories. An air fryer basket allows for crispy, high-temperature cooking without oil. A pizza stone ensures even heat distribution for perfect crusts.
A grill cover protects your investment from the elements, while a drive shaft replacement part maintains smooth operation. These accessories enhance functionality, durability, and versatility, helping you achieve professional-grade results at home.
Investing in these essentials ensures your Blackstone Grill remains a reliable and high-performing kitchen companion for years to come.
6.2 Upgrading Your Blackstone Grill
Upgrading your Blackstone Grill can elevate its performance and longevity. Consider replacing the motor for quieter operation and improved efficiency. A drive shaft replacement ensures smoother functionality.
Adding a rotating stone enhances even cooking and prevents hotspots. For pizza enthusiasts, a high-quality pizza stone is a must.
These upgrades not only enhance cooking results but also extend the life of your grill, making it a long-term investment in your culinary journey.
Safety Guidelines
Always handle high temperatures with care, using protective gloves and ensuring proper ventilation. Keep children away and follow maintenance guidelines to prevent potential hazards and ensure safe operation.
7.1 General Safety Precautions
Always read the manual thoroughly before using your Blackstone Grill. Ensure you understand all components and their functions. Wear protective gloves and eyewear when handling hot surfaces or sharp parts. Keep children and pets away from the grill while in operation. Never leave the grill unattended, especially when cooking at high temperatures. Ensure proper ventilation to avoid carbon monoxide buildup. Avoid wearing loose clothing that could catch fire. Keep flammable materials away from the grill. Regularly inspect and maintain the grill to prevent malfunctions. Follow all safety guidelines to ensure a safe and enjoyable cooking experience with your Blackstone Grill.
7.2 Handling High Temperatures Safely
When operating your Blackstone Grill, always handle high temperatures with caution. Use oven mitts or heat-resistant gloves to protect your hands from burns. Ensure proper ventilation in your cooking area to prevent heat buildup. Never touch the grill surface, stone, or metal parts during or immediately after cooking. Allow the grill to cool down completely before cleaning or storing. Avoid sudden temperature changes, as they can damage the grill or cause injury. Always monitor the grill’s temperature gauge and follow recommended cooking temperatures. Keep a fire extinguisher nearby and never leave the grill unattended while it’s in use.

Common Mistakes to Avoid
Avoid improper assembly, ignoring safety checks, and using incorrect cleaning methods. Prevent overheating by monitoring temperatures and ensuring proper ventilation during cooking sessions.
8.1 Avoiding Assembly Errors
Assembly errors can lead to poor performance and safety hazards. Ensure all parts are correctly aligned and securely fastened. Double-check the drive shaft and motor connections to prevent operational issues. Misaligned platters can cause uneven heating, so verify their placement. Refer to the manual for precise instructions and avoid overtightening, which may damage components. If unsure, consult online forums or tutorials for visual guidance. Proper assembly ensures smooth operation and longevity of your Blackstone Grill.
8.2 Preventing Overheating and Damage
Overheating can damage your Blackstone Grill and compromise safety. Ensure proper ventilation by keeping the grill away from flammable materials. Regularly clean vents and burners to maintain airflow. Avoid blocking the air intake, as this can cause temperature spikes. Monitor cooking temperatures and avoid exceeding the recommended 600°F. Sudden temperature changes can warp metal components, so adjust heat gradually. Inspect for worn-out parts, as they can lead to inefficient heat distribution. Proper assembly and maintenance are key to preventing overheating. Always follow the manual’s guidelines for operation and care to ensure long-term performance and safety.
Warranty and Support Information
Your Blackstone Grill is backed by a comprehensive warranty. Register your product for coverage details. For assistance, contact Blackstone support via their official website or support email.
9.1 Understanding Your Warranty Coverage
Your Blackstone Grill warranty provides coverage for manufacturing defects and ensures your investment is protected. The warranty period varies by product, typically covering parts and labor for a specified duration. Register your grill on the official Blackstone website to activate your warranty. Keep your purchase receipt as proof of ownership. The warranty does not cover damage caused by misuse, improper maintenance, or normal wear and tear. For detailed terms and conditions, refer to the warranty documentation provided with your purchase or visit the Blackstone support page online.
9.2 Contacting Blackstone Support
For assistance with your Blackstone Grill, contact their dedicated support team through the official website. Use the contact form or call the customer service hotline for inquiries. Ensure you have your product serial number and purchase details ready for efficient support. Additionally, Blackstone offers extensive online resources, including FAQs, manuals, and troubleshooting guides; Visit their support page to access these materials. For urgent issues, consider reaching out via phone or email for prompt resolution. Blackstone’s customer service is committed to helping you resolve any concerns and maximize your grilling experience.
Mastering your Blackstone Grill involves proper assembly, maintenance, and cooking techniques. By following this manual, you’ll ensure optimal performance and enjoy a superior grilling experience consistently.
10.1 Summary of Key Points
This manual has covered essential aspects of the Blackstone Grill, from assembly and troubleshooting to cooking techniques and maintenance; Proper setup ensures safety and functionality, while regular cleaning and part replacements maintain performance. Addressing issues like ignition problems, uneven heating, and platter rubbing can prevent damage. Upgrading accessories and following best practices enhance your grilling experience. By adhering to safety guidelines and avoiding common mistakes, you’ll extend the grill’s lifespan. Refer to warranty information for support and explore additional resources for further guidance. Consistent care and attention will ensure your Blackstone Grill remains a reliable cooking companion for years.
10.2 Final Tips for Long-Term Use
To ensure your Blackstone Grill remains in excellent condition, always store it properly after cleaning and drying. Regularly inspect and replace worn-out parts, such as the drive shaft or motor, to prevent further damage. Avoid extreme temperature fluctuations and never leave the grill unattended while in use. Explore additional resources like online forums and tutorials for advanced techniques and troubleshooting. By following these guidelines and maintaining consistent care, your Blackstone Grill will deliver exceptional performance and culinary results for years to come.
Additional Resources
Explore online forums like the Blackstone subreddit and YouTube channels for tutorials. Visit the official Blackstone website for manuals, FAQs, and customer support contact information.
11.1 Recommended Online Forums and Communities
Join the Blackstone subreddit for user-generated tips and troubleshooting. The official Blackstone forums offer expert advice and updates. Facebook groups like “Blackstone Grill Enthusiasts” share recipes and mods. YouTube channels such as “Blackstone Griddles” provide video tutorials. These communities are invaluable for maximizing your grill’s potential and connecting with fellow users. Active participation can enhance your cooking experience and help you stay updated on the latest trends and solutions.
11.2 Suggested Videos and Tutorials
Check out YouTube channels like “Blackstone Griddles” for detailed assembly tutorials and troubleshooting guides. Videos on “Blackstone Grill Setup” offer step-by-step instructions for initial configuration. For cooking inspiration, watch “Blackstone Recipes” to explore various meal ideas. Tutorials on “Blackstone Maintenance” provide tips for cleaning and extending the grill’s lifespan. Additionally, “Blackstone Pizza Oven Tips” shares expert advice for perfect pizza cooking. These videos are invaluable for visual learners, offering practical insights and enhancing your overall grilling experience. They cover everything from basic setup to advanced cooking techniques, ensuring you get the most out of your Blackstone grill.